
Electrical Control System, Part 1
So I felt it appropriate to title these following and related posts Van Life posts, only because they are completely related to Van Conversion Builds. This is something that my wife and I had been wanting to do for about a year now, and we are now finally in it! We have our van, I’ve completed three days of outfitting so far, to include installing the first layer of foil insulation barrier and all of the RV related wiring related to controls for lights, switches, water pump, outlets. I am still waiting on my Lithium Ion batteries to arrive, and then I will get into that part of the electrical system.
So, to start off, where do you even place the electrical system panel and converter? Ingeniously, as my wife does watch Van conversion videos nonstop it seems, under the front passenger seat. To our surprise, after removing the seat base cover, it is a completely empty box underneath. So that is where those components landed. And to make for easy wiring and a non-noticeable entry into the vehicle electrical system, the 30 amp connector is installed under the Van through the floor board. You would never know that I can power the living quarters area with external power at all without me telling you this!
Running wires in a building or a house, not a problem whatsoever. Through the walls of a van, quite a different situation comparatively. Not only is your structure much thinner, some areas are near impossible to pass through. Special tools are a must based on your specific situation. As well, your most important tool available to you is time. Do not rush through the process of installing the electrical system in your van. And spend a few extra dollars for rubber grommets and other wire protection items. It would be a shame to take all that time and then a month down the road one part of your system stops working because of a frayed wire. Always, always, always ensure that if a wire passes through a metal wall, cover the edge of the hole so wires do not gray and short out. A rubber grommet is about $2 at the store, and can and will save hours, and possibly days, of future work from happening if you simply want to save $50.
Wiring the electrical system into your Van RV is like putting the spinal cord into your skeleton and vertebrae. The electrical system like your nervous system and delivers life giving capabilities. You do want to take all necessary precautions and steps to protect your system. Again, f t IMR is one of four best tools, do not feel rushed. Double check everything you do to ensure that you do not miss one part of your project work. And ensure that you absolutely have the right tools for the job.
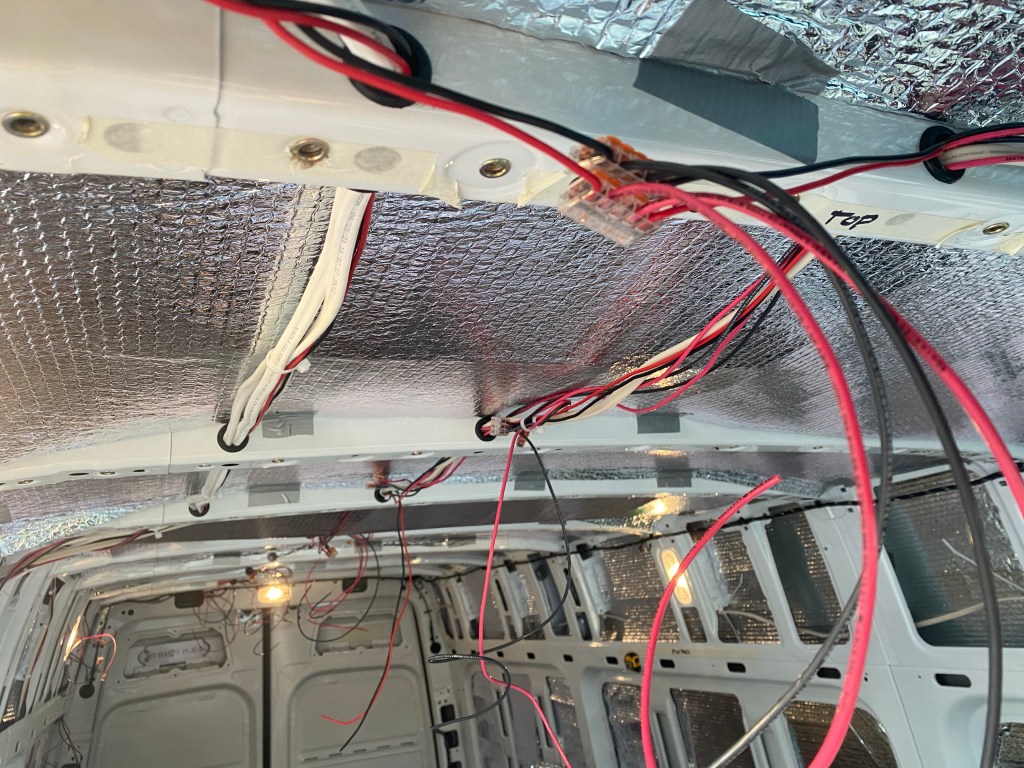
So, as an electrical technician for the past 20 years on aircraft and building automation controls systems, I’ll let you in on a little secret as I am not fond of secrets! For your wire connections, do not use crimp on connections, do not use twist type connections. These are good in specific situations. For the VAN Life and RV Life though, use WAGO connectors as you’ll see in the image below. These allow you to make simple connections, they come in a variety of sizes, and make for quick and easy modifications of the system. They clamp shut on the wire securely so you do not have to worry about the twist type wire connectors coming off as I’ve seen a few times over again in my years of work. WAGO connectors are simply the way to go, so invest some money into your system to make it more state of the art and modern while making easier to work on.


Leave a comment