

Setting Up Camp
So here is a small set up checklist that I created in our first quarter in, simple as it is, that I like to look at from time to time. Since then it’s been a great resource to utilize and share with others. It has grown in its content and robustness over time to add to its wealth of information.
- Before choosing your exact parking spot, it’s a good idea to perform a voltage check on the electrical post that you intend to power up your tiny home with. For this you can use the large surge protector that we all have purchased, or you can buy a small handheld Voltage and polarity tester which you can purchase for $30-40 on Amazon. The benefit here is that you save your expensive surge protector from possible catastrophe.
Journeyman-Pro 30/50 Amp RV – Portable Circuit Tester Analyzer Adapter, Male to Female Plug w/LED Test Indicator TT-30 NEMA 14-50 (14-50 (50 AMP), Circuit Tester (Male Only))

- Back your RV / Travel Trailer / tiny home into your Parking spot. This is the relief moment. This is when we all take a deep breath of relief!
- For 5th Wheel and Bumper Pull type units, Check and make sure that your tiny home is level inside the main door – side to side – and if not level, place board under appropriate set of tires and recheck side to side level. I also like checking the floor near our master bedroom and the center of the living room space to get a good average level across the house.
- Chock at least one tire on both sides of your RV – front and back of the tire – to prevent the RV from moving backwards when unhitching from the truck. If your ground is unlevel to a high degree I like using rocker levels which also double as chocks for the low side tires. These can be purchased from any rv supply store or Amazon.
CARMTEK Camper Leveler 2-Pack Kit | Curved RV Levelers with Trailer Wheel Chocks for Dual Axle Trailers | Faster RV Leveling System Than RV Leveling Blocks | RV Accessories for Travel Trailers

- Plug in main power – turn on the air conditioning. We all want to cool off after setting up the tiny home in hot weather, let’s get that AC cranking to cool down the house while you complete setting up camp!
- For 5th Wheel type unit’s – Lower the front legs lower section – pin lower adjustable leg section at or near the center of the legs. You will need to make adjustments based on your situation and where you are parked, but 9 out of 10 times I use center pin position on my legs for the lower adjustable section.
- For 5th Wheel type unit’s -Extend the front legs upper leg section with the extend-retract switch. Raise the front of RV until you see a slight separation of the 5th wheel hitch plate from the cradle.
- Unpin the hitch lock arm to open the cradle jaws – the truck will move free of the RV
- For Bumper Pull type unit’s – lower the nose jack to the ground enough to disconnect the ball hitch cup from the ball hitch on the truck bumper.
- Pull your truck ahead of your tiny home and park. We are almost done!
- Now that the parking and side to side leveling is complete, Lower the front of the RV while watching the front-to-back level of the RV from inside the main center door. I have also adopted the practice of double checking the leveling from above our steps and in the middle of the living and kitchen area. This just helps me to get a better average level across the entire house.
- Once completely level, lower the rear stabilizers. Please keep in mind that these are only for stability. Stabilizers are not weight bearing equipment and will bend and break under the weight and pressure of the RV.
- After the leveling of the RV is completed, you are now ready to hook up the city/drinking water hose, utility hose, and sewage hose. We always have an extra garden hose attached to a “Y” hose adapter for any purpose outside the RV so we don’t have to disconnect the city water connection for any reason at all.
Teardown
Preparing To Move, In the most easily stated terms, just run through the setup list in reverse order with the addition of making sure you empty the black and gray tanks and add water to the fresh water reserve tank – if you think you’ll need to use a substantial amount of water before hooking up to a city water supply again. Service the tanks the night before you plan to move. This is because when you wake up the next morning, you just need to pull in the slides, hitch up to your truck, and skedaddle. It can easily take an hour or more to properly flush and service tanks if you have a full sized, 40+ foot tiny home unit. You don’t want that slowing you down the morning of your move.
Below are some of the toilet and sewage tools we use to help keep our black tank system as clean as possible.
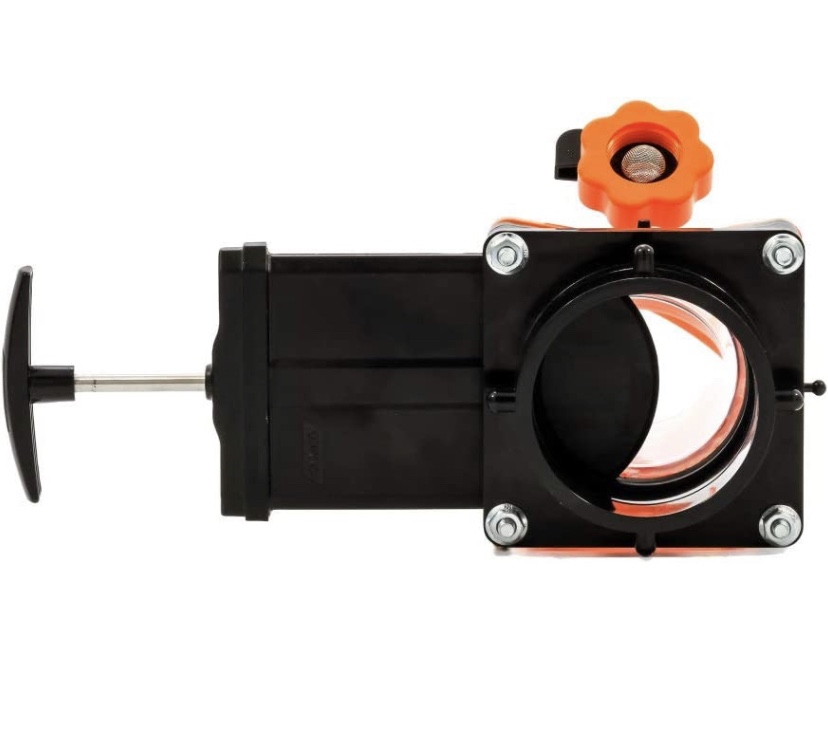
Bayonet Mounted Sewage Valve
Camco 39085 Rhino Blaster Pro Holding Tank Rinser w/Gate Valve
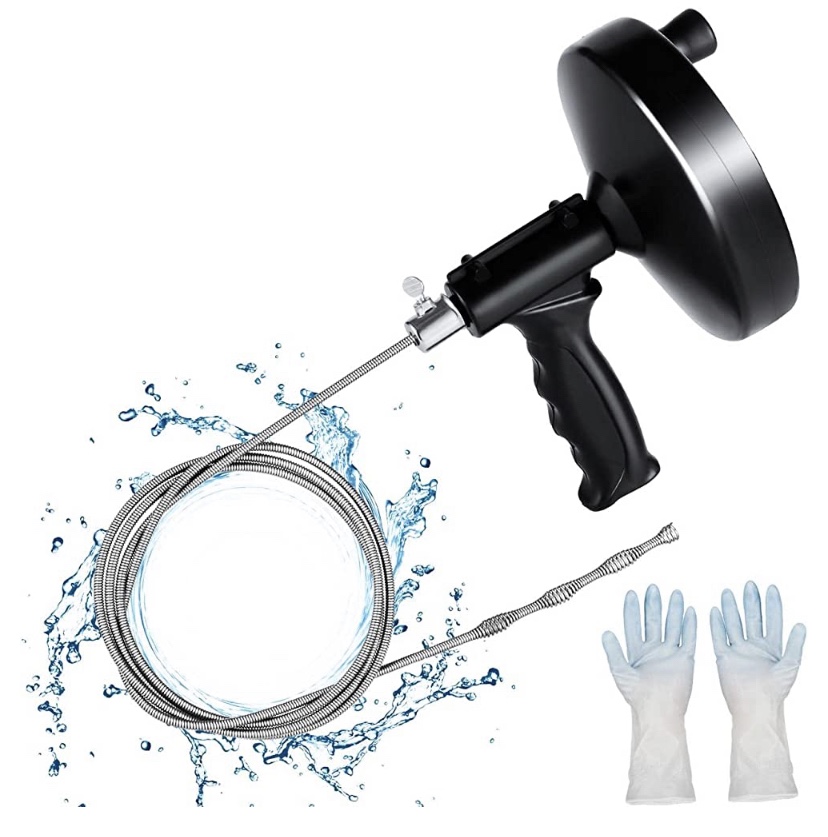
RV Toilet Snake
AMESEDAK 25 Feet Plumbing Snake Drain Auger, Heavy Duty Pipe Clog Remover with Gloves, for Bathroom, Kitchen and Toilet Snake Drain Cleaner
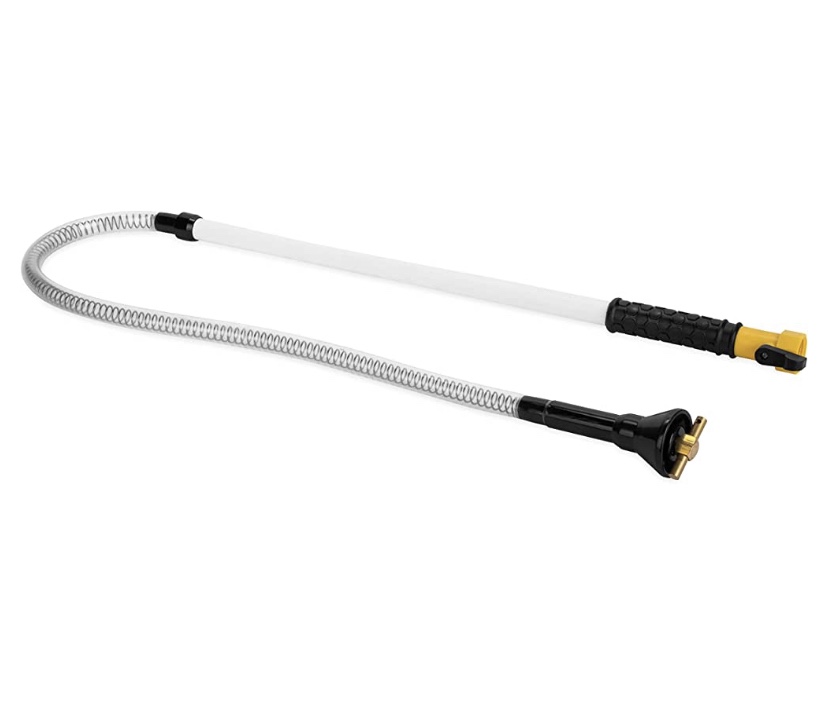
RV Black Tank Hose Wand
Camco RV Holding Tank Swivel Stik Rinser | Features a Powerful Rotary Cleaning Action, a One-Quarter Turn Shut-Off Valve, and a Flexible Design (40074)
There you have it, my procedure to set up and tear down my tiny home. I hope that you have enjoyed reading this article and have found it useful. Keep looking for more articles to come that I’ll be posting that touch on other various topics or I’ll just keep sharing updates from the road sharing amazing places to see and experience! Happy travels!

Leave a comment